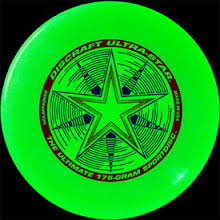
Glow-in-the-dark Frisbee
Everyone loves glow-in-the-dark.

Everyone loves glow-in-the-dark.
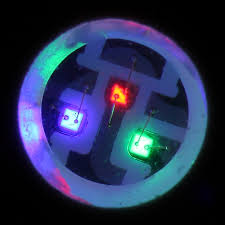
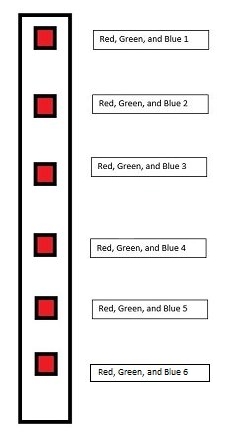
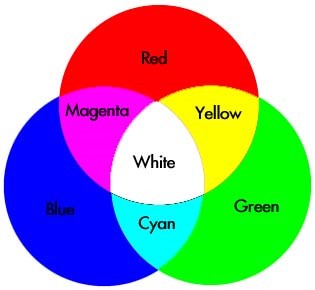
Your Frisbee has 6 RGB LEDs. Each Light Emiting Diode can glow Red, Green, and Blue. By combining these 3 colors in different ways, you can create almost any color.

This allows the microcontroller to control the LEDs.
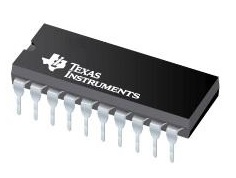
This is basically a small computer on a single chip. This chip will control the LEDs.
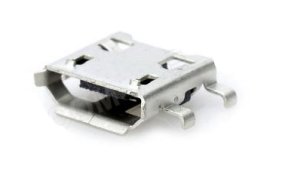
This connector is on the frisbee board. You will use an USB cable to connect this board to your computer and use it to program your microcontroller.
You can choose to re-label the LEDs in any way you want, but this lets you know the pin location of each LED.
RED1 = 20
GREEN1 = 21
BLUE1 = 19
RED2 = 17
GREEN2 = 18
BLUE2 = 16
RED3 = 3
GREEN3 = 4
BLUE3 = 2
RED4 = 6
GREEN4 = 8
BLUE4 = 5
RED5 = 10
GREEN5 = 11
BLUE5 = 9
RED6 = 13
GREEN6 = 14
BLUE6 = 12
| Command | Explanation |
|---|---|
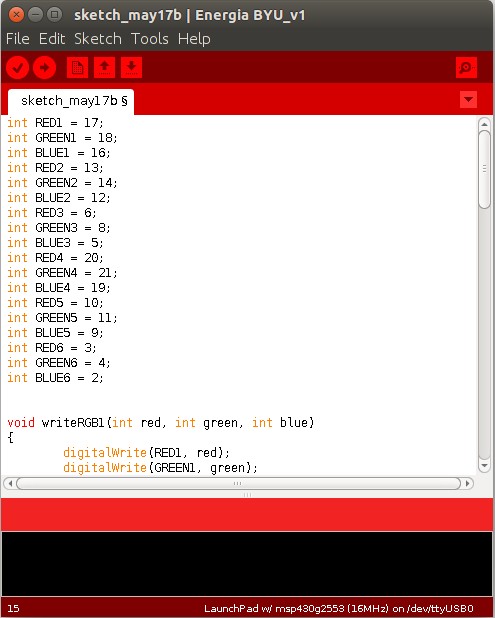
| int RED1=17; | Assigns the name RED1 to the value 17, allowing you to turn the innermost red LED on by name rather than trying to remember the pin #. From this point, any time you type “RED1” the program will interpret it as the value “17,” or pin #17. |
| pinMode(name, OUTPUT); | Sets the LED as an output. Put this in the setup code. |
| digitalWrite(name, HIGH); | Turns the LED off. |
| delay(time); | Causes a delay for the given number of milliseconds. |
| Color | LEDs on | ||
|---|---|---|---|
| Red | Red | ||
| Yellow | Red | Green | |
| Green | Green | ||
| Cyan | Green | Blue | |
| Blue | Blue | ||
| Magenta | Red | Blue | |
| White | Red | Green | Blue |

for(int i=0; i < 10; i++){
  digitalWrite(LED1,HIGH);
  digitalWrite(LED2,HIGH);
  digitalWrite(LED3,HIGH);
  delay(50);
  digitalWrite(LED1,LOW);
  digitalWrite(LED2,LOW);
  digitalWrite(LED3,LOW);
  delay(50);
}
Additional programming help can be found at energia.nu/guide
Additional download options can be found at energia.nu/download
Note: These downloads will not work for your frisbee!
The LED Frisbee design has been carefully tested to ensure durability. However, they are not indestructible. The Frisbee should be fine for normal use, and should even be able to survive small amounts of water, but it is recommended that it be used with care, and not used in the rain or near large amounts of water.
The battery is attached with zip ties to ensure that it won’t fall out during a hard impact. Get your parents to help you clip the zip ties. If you want, you can pull out the zip ties and insert new ones, or a piece of sturdy tape, such as duct tape, will hold the new battery in place.
The boards have been attached with industrial strength adhesive that should withstand normal use. In the unlikely event that the LED board becomes detached from the Frisbee, using strong tape, such as duct tape, should reattach the board well enough for normal use.
Some of the LEDs on your Frisbee might not work for every color, or may stop working eventually. If this is the case with your Frisbee, it is your job as an engineer to program a pattern that still looks cool without using that color.
First, make sure that you have downloaded the BYU version of Energia. This version has been specially modified to work with your frisbee board. Next, check to make sure that you are connecting to the correct device within energia. If these are not your problems then unfortunately, electronics cannot be made to last forever. A microcontroller such as the MSP430 will eventually fail overtime and use. If this happens, there isn't much you can do, but you still have a great glow-in-the-dark frisbee! Note: It should only fail after A LOT of use. This most likely won't happen to you.
| int | Short for integer (a number). It is used in a program to assign a variable, which can be used to give a number value (in this case a pin number) a name that is easy to remember. If this is done at the beginning of the program, any time that name is used, the program will interpret it as the number. |
| Variable | A name or symbol that is assigned to a value, such as using int RED1 = 15; to assign the value of 15 to the name RED1. |
| LED | Short for light emitting diode. A small, bright light that requires little power to turn on. |
| RGB | Short for red, green, and blue. Since these are the primary colors of light, they can be combined to make any color. |
| Pin | The chip for the microcontroller has several pins. Writing programs in energia allows you to control whether or not electricity flows through one of the pins. In the case of the Frisbee, this allows you to decide which LEDs are turned on. |
| Loop | A part of a program that repeats continually. |
| “for” loop | A loop that continues until the conditions set for the loop are completed |
| Pulse width modulation | The process of turning on and off an LED quickly such that it appears to be dimmer or brighter. This is done using a loop or a delay. |
| Programming Language | Computers only really only understand 1’s and 0’s. However, to make things easier for people, programming languages have been created, which the computer then compiles down to 1’s and 0’s. This way, both people and the computer can understand what is happening. A programming language generally consists of specific, simple commands, which can be combined to do many things. The programming language for energia is specifically made to make programming simple for the MSP430 Launchpad. |
| Energia | A simple programming language specifically for the MSP430 Launchpad. |
| Algorithm | Computers are very useful and fast, but they aren’t very smart. They can only accept specific, simple commands. A list of simple commands that can be used to accomplish a task is called an algorithm. |
| Electrical Engineer | A cool person that gets paid a lot of money to do awesome stuff. |


// Generic code for the LED Breadboard part of the Innovations Module
// assert high. Code turns on/off all five LEDs every second.
#define ledOne 2
#define ledTwo 3
#define ledThree 4
#define ledFour 5
#define ledFive 6
void setup() {
// put your setup code here, to run once:
pinMode(ledOne, OUTPUT);
pinMode(ledTwo, OUTPUT);
pinMode(ledThree, OUTPUT);
pinMode(ledFour, OUTPUT);
pinMode(ledFive, OUTPUT);
}
void loop() {
// put your main code here, to run repeatedly:
digitalWrite(ledOne, LOW);
digitalWrite(ledTwo, LOW);
digitalWrite(ledThree, LOW);
digitalWrite(ledFour, LOW);
digitalWrite(ledFive, LOW);
delay(1000); //1000 = 1 second
digitalWrite(ledOne, HIGH);
digitalWrite(ledTwo, HIGH);
digitalWrite(ledThree, HIGH);
digitalWrite(ledFour, HIGH);
digitalWrite(ledFive, HIGH);
delay(1000);
}
/*
* Chip Camp Car
* Michael Eyler
* May 2018
*/
#define enR 3 //Right motor enable (PWM)
#define R1 4 //Right motor port 1
#define R2 5 //Right motor port 2
#define enL 9 //Left motor enable (PWM)
#define L1 7 //Left motor port 1
#define L2 8 //Left motor port 2
int motorSpeed=130;
void setup() {
pinMode(enR, OUTPUT);
pinMode(R1, OUTPUT);
pinMode(R2, OUTPUT);
pinMode(enL, OUTPUT);
pinMode(L1, OUTPUT);
pinMode(L2, OUTPUT);
analogWrite(enR,motorSpeed);
analogWrite(enL,motorSpeed);
}
void loop() {
//Go straight for 2 seconds
forward(2000);
//Go left for 0.5 seconds
left(500);
}
void cease() {
digitalWrite(R1,LOW);
digitalWrite(R2,LOW);
digitalWrite(L1,LOW);
digitalWrite(L2,LOW);
}
void forward(int dis) {
digitalWrite(R1,HIGH);
digitalWrite(R2,LOW);
digitalWrite(L1,HIGH);
digitalWrite(L2,LOW);
delay(dis);
cease();
}
void left(int ang) {
digitalWrite(R1,HIGH);
digitalWrite(R2,LOW);
digitalWrite(L1,LOW);
digitalWrite(L2,HIGH);
delay(ang);
cease();
}
// BYU Chip Camp 2019
// Innovations Module - LED Frisbee
// Template code - turns on each light, one at a time
#define RED LOW,HIGH,HIGH
#define YELLOW LOW,LOW,HIGH
#define GREEN HIGH,LOW,HIGH
#define CYAN HIGH,LOW,LOW
#define BLUE HIGH,HIGH,LOW
#define MAGENTA LOW,HIGH,LOW
#define WHITE LOW,LOW,LOW
#define OFF HIGH,HIGH,HIGH
int LEDs[6][3] = {
{20, 21, 19}, //LED1
{17, 18, 16}, //LED2
{3 , 4 , 2 }, //LED3
{6 , 8 , 5 }, //LED4
{10, 11, 9 }, //LED5
{13, 14, 12} //LED6
//RED, GREEN, BLUE
};
// Function that turns on a specified LED to a specific color
void writeRGB(int LEDNUM, int c1, int c2, int c3){
digitalWrite(LEDs[LEDNUM-1][0], c1);
digitalWrite(LEDs[LEDNUM-1][1], c2);
digitalWrite(LEDs[LEDNUM-1][2], c3);
}
// Function that turns off all 6 LEDs
void clearLEDs()
{
for(int x=1;x<=6;x++)
{
writeRGB(x,OFF);
}
}
// put your setup code here, to run once:
void setup()
{
// This code cycles through each pin and sets it up as an output
for(int i = 0; i < 6; i++){
for(int j = 0; j < 3; j++){
pinMode(LEDs[i][j], OUTPUT);
}
}
clearLEDs();
}
void loop()
{
//Basic Colors - Red, Green, and Blue
writeRGB(1,RED); //Turn the first one RED
delay(750); //Wait 750 milliseconds
writeRGB(2,GREEN); //Turn the second one GREEN
delay(750);
writeRGB(3,BLUE); //Turn the third one BLUE
delay(750);
writeRGB(4,WHITE); //White - All colors combined!
delay(750);
writeRGB(5,BLUE); //Turn the fifth one BLUE
delay(750);
writeRGB(6,GREEN); //Turn the sixth one GREEN
delay(2000);
}